Monday, July 4, 2011

GRILLED TUNA W. SAUTEED VEGETABLES & GRILLED EGGPLANT

Delicious impromptu & healthy meal!
We wanted to eat something healthy this night, so I opted for fish and veggies and got tuna that was on sale.  As for the veggies, we usually go broccoli or green beans, and I decided we should have something different, so I got a yellow bell pepper, zucchini, red onions and eggplant!  Delicious turnout!

Ingredients (serves 2):
2 - 6-8 ounce portions of tuna steak
Chimichurri sauce, recipe follows
1 small Italian eggplant, sliced in 1/4 inch thick rounds
1 yellow bell pepper, cored and seeded and sliced in strips
1 small zucchini, cut into 1/4 inch rounds and each round halved
1/2 red onion, sliced into 1/4 inch rings
1/2 shallot, thinly sliced
2 cloves garlic, sliced like garlic chips
1 teaspoon Chipotle Chile powder
1/2 lemon, cut into 4 wedges
Olive oil
Salt
Pepper


  1. Marinate the tuna in 1/3 cup of  the chimichurri sauce for 30 minutes in a sealable plastic bag or in a bowl covered with plastic wrap, turning halfway through.  Place cut up zucchini and eggplant on a plate and sprinkle with salt to extract some water (so that they saute and don't get watery in the pan).
  2. Heat a grill pan to medium-high.  Heat a medium saute pan to medium-high (closer to medium) with about 1 tablespoon of olive oil.  
  3. Saute the garlic and shallot in the saute pan for one minute.  Toss in the bell pepper, zucchini, and red onion.  Add the Chipotle Chile powder, and season with salt and pepper.  Saute for about 6-8 minutes, stirring frequently.
  4. Meanwhile, place the eggplant slices on the grill pan, flip after one minute, then place on the edges of the grill pan.  Add the tuna to the center of the grill pan and sear each side for 2 minutes to have a rare-medium center.
  5. Serve with the reserved chimichurri sauce and lemon wedges.
Chimichurri sauce - There are tons of recipes online and lots of varieties.  It is basically made of several herbs, olive oil, and an acidic component such as red wine vinegar or lemon.  I looked up different recipes and made it with what I had on hand - the measurements are approximate - taste it first!

1/3 cup olive oil
1 small handful basil, finely chopped
1 small handful parsley, finely chopped
1/4 cup red wine vinegar
2 tablespoons finely chopped red onion
Salt
Pepper

Whisk together olive oil and red wine vinegar, add herbs and onion, salt & pepper to taste.
Marinating the tuna
Salted zucchini to extract some water

Grilling the eggplant


Sauteeing the vegetables

Grilling the tuna w. the eggplant on the edges


Thursday, May 19, 2011

OVEN-ROASTED TOMATO SAUCE!

Used over spaghetti with hot Italian sausage!
Don't get me wrong, I have nothing against pasta sauce that comes in a jar, but once in a while we like to make this homemade pasta sauce that I got from a magazine sample that I received in the mail called "Cuisine at Home" (which I was VERY tempted to subscribe to, but didn't because I barely get through the cooking ones that I have!).  It was in there for use as the sauce for pizza, but it's great for a simple yet delicious pasta.  If you have the time to wait for it to roast, totally worth it!

Makes 5 cups; Total time: 50 minutes
(I make about half of this recipe for 3-4 servings of pasta, but you could always save some sauce for another day)

Ingredients:
4 lbs. Roma tomatoes, quartered (8 cups)
1 cup chopped onion
4 cloves garlic
2 tsp. kosher salt
1 tsp. red pepper flakes
1 tsp. sugar
1/2 cup olive oil
1/2 cup snipped fresh basil (if I don't have it, I use dried and it works out okay)


  1. Preheat oven to 450 degrees.
  2. Combine tomatoes, onion, garlic, salt, pepper flakes, and sugar in a large baking dish.  Toss tomato mixture with olive oil.
  3. Roast until tomatoes soften, 35-40 minutes.  Remove from oven and mash with a potato masher, keeping tomatoes a bit chunky.
  4. Stir in basil.


This time we threw in some cooked hot Italian sausage to add a little spice and meat, but we've had pasta a couple of times with just the sauce.  We've also tried it on pizza and it's delicious!

Tuesday, May 17, 2011

JALAPENO POPPERS! BAKED!

Baked jalapeno poppers!  Yes, I would make them again!
Indulgence before food restrictions!  We had leftover jalapenos, and I had been wanting to try making jalapeno poppers, so why not??  Since we were having them with quesadillas, I figured I should bake them instead of frying them.  Still delicious!

Makes 6 jalapeno poppers
6 good-sized jalapenos
4 ounces low-fat cream cheese, softened
Dash cayenne pepper
1/2 chopped green onion
1 cup bread crumbs
1 cup flour
1 egg
1 tablespoon milk


  1. Preheat oven to 350 degrees.
  2. Wrap foil over a shallow baking pan and spray lightly with cooking spray.
  3. Slit jalapenos down the center on one side, do not cut all the way through.  Remove seeds and membrane.
  4. Mix together cream cheese, cayenne pepper, and green onion in a small bowl.
  5. Stuff the jalapenos with the cream cheese mixture and press the slit closed.
  6. Mix the egg and milk in a bowl, and place the bread crumbs in another bowl, and the flour in a third bowl.
  7. Carefully dip each jalapeno in the flour, then the egg mixture, then the bread crumbs and place slit-side up in the baking pan.
  8. Bake for 30 minutes until the outside is golden and crunchy.
We ate them with sauteed onion and cheddar quesadillas, served with cilantro sour cream!  Indulgence on cheese to the max.  Perhaps these will make an appearance during football season!... if we have one.  

Slit and seeded

Coated and going in the oven!
Served with quesadillas, salsa, and cilantro sour cream

Sunday, May 15, 2011

DEVILED BEEF SHORT RIB STEW

Tender and flavorful!  When I get the chance, will DEFINITELY make it again!
I had the day off a few weeks ago and going along with playing housewife for the day, I realized I had time to actually prepare a slow-cooked meal for dinner!  Although it's made in the slow cooker, the prep beforehand and the sauce afterwards makes it a little more involved than other slow cooker recipes.  This recipe comes from the Cooking with Beer recipe book that David got from his parents.  Great stuff from that book so far!

Modified to make 3-4 servings
2 pounds beef short ribs, trimmed
1 pound small red potatoes, scrubbed and scored
4 carrots, peeled and cut into chunks
6 ounces beer
4 tablespoons French's Spicy Brown mustard, divided
1.5 tablespoons Worcestershire Sauce, divided
1 tablespoon cornstarch

Directions:

  1. Broil ribs 6 inches from heat on rack in broiler pan 10 minutes or until well browned, turning once.  Place vegetables in bottom of slow cooker.  Place ribs on top of vegetables.
  2. Combine beer, 3 tablespoons mustard and 1 tablespoon Worcestershire in medium bowl.  Pour into slow cooker.  Cover and cook on HIGH setting for 5 hours or on LOW for 10 hours or until meat is tender.
  3. Transfer meat and vegetables to platter; keep warm.  Strain fat from broth; pour broth into saucepan.  Combine cornstarch with 1 tablespoon cold water in small bowl.  Stir into broth with remaining 1 tablespoon mustard and 0.5 tablespoon Worcestershire.  Heat to boiling, reduce heat to medium-low.  Cook 1 to 2 minutes or until thickened, stirring often.  Pass gravy with meat and vegetables.  Serve meat with additional mustard.
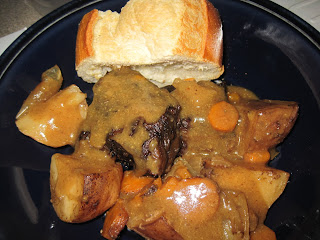
There was enough sauce that we didn't need additional mustard to serve it, and we had a little piece of toasted french bread to go with it.  Slow cooker dishes and short ribs are fantastic!  The meat was so tender and the flavors in this dish were great.

After the short ribs were broiled and first placed in the slow cooker.

Done in the slow cooker!

Cut into pieces and kept warm on the side while the sauce was being made

Thursday, April 21, 2011

PEPPER AND PARM-CRUSTED SNAPPER WITH TOMATO-BASIL SAUCE

I'd have it again!
This recipe comes from my Rachael Ray magazine.  I saw it the night before, tried to find it online the next day and couldn't remember what it was called, so I ended up finding another recipe and buying the snapper that the other recipe required, and thankfully it was similar enough and I had the remaining ingredients to still make this dish but with snapper (instead of halibut).  Modifications are in RED (and made for two):

For the sauce:
  • About 1 tablespoons extra virgin olive oil (EVOO)
  • 1 cloves garlic, chopped
  • 1/2 large shallot, chopped
  • 1/2 pint grape tomatoes, halved
  • A few leaves of basil, torn
  • Salt and pepper
For the fish:
  • About 1/3 cup cornmeal
  • 1/8 cup grated Parmigiano Reggiano cheese
  • Lots of coarse black pepper
  • 12 ounces red snapper with skin on
  • Extra virgin olive oil (EVOO), for frying
  • Store-bought balsamic drizzle (or reduce 1/4 cup vinegar with 1 tablespoons brown sugar until syrupy), for topping (I did the reduction and let it simmer on medium low until it reduced in amount and thickened)
Preparation
Heat 1 tablespoon EVOO, two turns of the pan, in a skillet over medium heat. Add the garlic and shallot and stir for a couple of minutes. Add the tomatoes and basil, season with salt and pepper and cook to break down the tomatoes, 10-15 minutes.

Mix the cornmeal with the cheese and black pepper. Add the fish and turn to coat. Heat a thin layer of EVOO in a large skillet over medium-high heat. Cut slits with a sharp knife on the skin side so that the fish doesn't curl up in the pan.  Add the fish (skin-side down first) and cook, turning once (after about 5 minutes), until crisp and brown all over, 8-10 minutes.

Top the fish with the tomato sauce and a little Balsamic Drizzle.

The tomatoes breaking down

Sauteeing the fish
It was pretty good.  I liked it more the more bites I took.  It's definitely something different in our book of recipes.  The parmesan-cornmeal crust gave it a nice crunch that held up to the tomato-basil sauce and balsamic reduction.  With it I served sauteed broccoli - sauteed in butter and red onions!  I ended up using a number of pans that night, but it was quick and easy!

Wednesday, April 13, 2011

GRILLED PORK CHOPS & MIXED HERB CHIMICHURRI w. GREEN BEANS


 It was a warm(er) day for grilling, and we had some fresh herbs on hand, so I looked for a recipe and voila!  Delicious grilled pork chops.  However, while I usually blanch and then sautee green beans as a side, I decided I wanted to spend prep time outside with David while he grilled and had this not-so-fantastic idea of roasting my green beans instead, and like a dummy, I just assumed that 30 minutes or so of roasting would do the trick and didn't even look it up.  Yes, they were edible, but no, we did not enjoy them.  Green beans FAIL!

The original recipe for the flavor-filled pork chops, however, is here:
http://www.foodnetwork.com/recipes/emeril-lagasse/marinated-and-grilled-pork-chops-with-mixed-herb-chimichurri-recipe/index.html
My modifications to the recipe are in RED:

  • 1/2 cup extra-virgin olive oil
  • 1/3 cup red wine vinegar
  • 1 tablespoon lemon juice
  • 2 tablespoons chopped fresh basil leaves
  • 2 tablespoons minced garlic
  • 2 tablespoons minced shallots
  • 1 tablespoon chopped fresh cilantro leaves
  • 1/4 tablespoon dried oregano leaves
  • 1/2 cup chopped fresh flat-leaf parsley leaves
  • 1/2 serrano pepper
  • 1/4 teaspoon crushed red pepper
  • 1 1/2 teaspoons kosher salt
  • 1 1/4 teaspoons freshly cracked black pepper
  • 2 (12-ounce) double-cut pork chops

Directions

In the bowl of a food processor, combine the olive oil, red wine vinegar, lemon juice, basil, garlic, shallots, cilantro, oregano, parsley, jalapeno and crushed red pepper. Pulse until well blended but do not puree. Add 1/4 teaspoon of salt and 1/4 teaspoon of the black pepper. Remove 1 cup of the chimichurri sauce from the processor and transfer to a non-reactive bowl, cover with plastic wrap and reserve at room temperature for up to 2 hours. If cooking pork another day, refrigerate sauce and return to room temperature before serving.

Season the pork chops on both sides with the remaining 1 teaspoon of the kosher salt and the remaining teaspoon of the black pepper and place in a glass bowl. Add the remaining chimichurri sauce from the processor. Cover with plastic wrap and refrigerate the pork chops for at least 2 and up to 4 hours.


The marinade

Marinating the meat!
Brushed off and ready for the grill

 Preheat a grill to medium.


Once the pork chops have finished marinating, remove them from the refrigerator and let them come to room temperature for 45 minutes. Brush the excess chimichurri sauce off the chops and set the chops over the hot grill. Cook for 7 to 8 minutes on the first side. Turn the chops over and continue to cook until they are done, another 7 to 8 minutes.

Once cooked through, serve the chops with the crusty bread and pour 1/4 cup of the reserved chimichurri sauce over each chop before serving.

Notes: I used red wine vinegar because we already have about 5 different types of vinegar in our cabinet, and I didn't want to buy another one, but it turned out fine.  I made the marinate the day before and refrigerated it overnight.  Our pork chops marinated for two hours, and taken out for 30 minutes before we put it on the grill.  Instead of serving it with bread like the recipe calls for, we had green beans, which again, I FAILED to make.  Thus, here's my lesson learned on how NOT to make green beans:
They looked so good before I messed them up :(

No longer roasted...
 
Next time, I will either roast them longer than 30 minutes at 375 degrees, blanch them first, or just find a recipe!  They weren't soft enough when the 30 minutes was up, so in an attempt to save them, I added a little water to the pan, covered it up with foil and put them back in the oven to steam a little, and yes, they got softer, but they also got soggy and not roasted like I had wanted them.  They were edible, but definitely not what I was looking for and thus, upset me, and probably prolonged this blog entry!  Lesson learned.  


Besides the green beans fail, the pork chop was delicious, plus any leftover pork chop with the leftover sauce topped a salad wonderfully the next day for lunch!
I love delicious leftovers!


Wednesday, April 6, 2011

PERFECT CRISPY POTATOES!

Of course I forgot to picture the done potatoes by themselves - here they are on the side!
I use whatever potatoes I have on hand usually, and honestly, it turns out different every time, but this time it turned out really good!  I don't know if it was the russet potato, or the rinsing of the cubes before I fried them, or maybe they just fried a little longer in the pan, but whether or not they get perfectly crispy, they taste good!  Sometimes their time in the oven also just depends on how long the rest of the meal takes to cook.

The original recipe:
Modifications in RED (to serve 2):

  • 3 tablespoons vegetable oil 
  • 1 russet potato, peeled, and cut into 1/2-inch cubes
  • Kosher salt and freshly ground black pepper
  • 1 tablespoon water
  • 1/2 tablespoon Country Crock spread
  • Red (Cayenne) Pepper powder
  • Garlic Powder
  • 1/8 cup parsley, chopped

Directions

Preheat oven to 400 degrees F.
Rinse potato cubes in water, and pat dry with paper towels.  Meanwhile, in a large saute pan, heat the oil over medium-high heat. Add the potato cubes and season with salt and pepper, red pepper powder, and garlic powder to taste. Saute stirring frequently, for 7 minutes. Turn the heat up to high, add the water, stir, and cover the pan with a lid. Steam the potatoes until the water evaporates, about 3 or 4 more minutes. (Every 1 to 2 minutes, open the lid long enough to stir the potatoes so they don't stick.) Lower the heat to medium, and saute another 3-4 minutes until all traces of water are gone. Toss in the butter and stir to coat the potatoes. Spread the potatoes out on a glass baking dish. Bake in the oven until the potatoes are crisp and browned to your liking, about 20 minutes depending on how dark you want them. Transfer the potatoes to a serving bowl, toss the potatoes with parsley, and serve.
It's a great go-to potato recipe if you're looking for a side dish or you have leftover potatoes!


Cubed raw potatoes

After being sauteed in the pan, before the baking

Monday, April 4, 2011

FISH TACOS topped with AVOCADO, CORN, TOMATO SALAD!

Fish Tacos served with Perfect Crispy Potatoes (separate blog to follow)

Having bought too much cod for Fish and Chips night, we had about 3/4 of a pound left for us to make fish tacos!  I've looked up a few recipes for fish tacos in the past, but this time I just made it out of whatever we had on hand.  We also had leftover avocado and tomato, so I decided to make the avocado, corn, tomato salad!

Makes 6 tacos

Ingredients - 

Avocado, Corn, Tomato Salad:

  • 1/2 avocado, chopped into 1/4" x 1/4" cubes
  • 1/2 cup frozen corn (microwave with water as package directs, let it cool)
  • 1 small tomato on the vine, chopped 
  • Small handful of cilantro, chopped
  • 1/8 lime wedge
  • 2 tablespoons of finely chopped red onion
  • 1/2 teaspoon salt
1.  Mix together all of the ingredients in a medium bowl, cover with plastic wrap, and let chill in the refrigerator.
Avocado, Corn, Tomato Salad mixed together
  • 6 ounce cup plain Greek Yogurt (an AWESOME substitute for sour cream!)
  • 1 teaspoon Chipotle Chili Powder
  • 3/4 pound cod (if it's thick, make two filets, about 1/4 inch thick)
  • Paprika
  • Garlic Powder
  • Salt
  • Pepper
  • 2 tablespoons Olive Oil
  • 6 flour tortillas
  1. Put the Greek Yogurt in a small bowl and add the Chipotle Chili Powder - place in the refrigerator to chill.
  2. Sprinkle the cod with paprika, garlic powder, salt, and pepper, on one side.
  3. Heat the olive oil in a medium size pan over medium-high heat.
  4. Place the fish, seasoned side down, in the heated pan and cook for about 4 minutes.  Season the non-seasoned side (which should be face up) with more paprika, garlic powder, salt, and pepper.
  5. Meanwhile, heat up a small pan and heat the tortillas as directed on the package, keeping the done tortillas wrapped in foil.
  6. Flip the fish over and cook the other side for another 4 minutes, until seared, and the fish becomes flaky.
  7. Take the fish out of the pan and pull apart into flakes with a fork or tongs.
  8. Serve the fish with the tortillas, greek yogurt sauce, and the avocado, corn, tomato salad!  Enjoy!


Step 4 - sauteeing the cod in the pan
The cod flaked apart

Cod as the first layer

Avocado, corn, tomato salad next

Greek Yogurt on top!  Guilt-free!

I was afraid that there were too many elements since I just threw things into it, but it turned out really well and all came together.  I cannot express how much I love using plain Greek Yogurt as a substitute for sour cream!  It's so good for you and has the same cool-the-mouth effect, especially if you add seasoning to it!  I think David and I both agree that this was a great adventure that turned out well.  Let me know if you give it a try!  I highly recommend it.  It also doesn't take too long for a weeknight dinner!

Friday, April 1, 2011

BACON & TOMATO PASTA!

I've made this one several times; it's easy and always so good!


A Guy Fieri recipe:
No modifications necessary!

Ingredients:
  • 2 tablespoons kosher salt
  • 16 ounces whole wheat spaghetti pasta
  • 1 pound thick-cut bacon, chopped
  • 3 tablespoons extra-virgin olive oil
  • 1 cup red onion, diced
  • 1 teaspoon red chili flakes
  • 3 tablespoons garlic, minced
  • 2 cups Roma tomatoes, diced
  • 1/4 cup red wine (not too important which kind - we just choose whatever we want to drink with dinner)
  • 4 tablespoons fresh basil, chiffonade (stack the basil leaves flat on top of each other, tightly roll them up together, and cut into thin slivers)
  • 1/4 cup freshly grated Parmesan
  • Salt and freshly ground black pepper

Directions:

  1. In a large stock pot, boil 3 quarts of water, when boiling add 2 tablespoons kosher salt and the pasta and cook until the pasta is al dente.
  2. In a large saute pan over medium heat, add bacon and saute until bacon is crispy. Remove bacon to drain on a paper towel-lined plate and remove 3/4 of the bacon fat from the pan. Add extra-virgin olive oil, onions, and red chili flakes. Cook until onions are translucent, add garlic, cook for 2 minutes then add tomatoes. Saute for 5 minutes, then deglaze with wine.
  3. Drain pasta and add to the tomato mixture pan. Add basil and bacon. Toss with Parmesan, and add salt and pepper, to taste


The bacon nice and toasty!

Sauteeing the red onion

With the garlic and tomatoes

Deglazing the pan
Serve the bacon tomato pasta with the rest of the red wine! (Our wine for the night)
I wanted to share this recipe since it's so easy to make and it's quick and delicious!  It's very simple, but the flavors are so prominent.  If you love bacon, make this!!  We add a little red pepper and freshly grated parmesan before serving.  We've realized that a fresh block of parmesan lasts a while, so we think it's worth buying to have some freshly grated parmesan on hand!

(Side note: we ate this Wednesday night; Lenten Friday fish meal will be posted in a few days!)

Wednesday, March 30, 2011

SAUSAGE LASAGNA!

LASAGNA!  Yes, please!  We modified, though, I figure that unless you're short on supplies, it's hard to mess it up!  Serve with a bottle of red wine!

Below is the recipe I used, with my modifications in red.  I gave up beef for Lent, so I only used Italian sausage.  Instead of creating a 9"x13" casserole (since there were lots of other things I wanted to cook/eat this week!) we halved the recipe and made it in an 8"x8" dish.  With a few cuts of the lasagna pasta pieces, it turned out fine. 

The original recipe: http://www.foodnetwork.com/recipes/tyler-florence/lasagna-al-forno-recipe/index.html

Ingredients (half the original recipe):
  • 1/2 pound dried lasagna noodles
  • Olive oil
  • 1/2 onion, chopped
  • 2 cloves garlic, sliced (didn't halve because we love garlic!)
  • 2 tablespoons fresh basil, chopped
  • 1 teaspoon dry oregano
  • 3 bay leaves
  • 1 pound ground Italian sausage
  • 3 ounces tomato paste
  • 15 ounces ricotta cheese, (1 container)
  • 1/4 cup Italian flat-leaf parsley, finely chopped
  • 1 teaspoon dry oregano, chopped
  • Salt and black pepper, to taste
  • 1 egg, lightly beaten
  • 1/2 cup grated Parmesan cheese
  • 2 cups tomato sauce, prepared
  • 2 cups mozzarella cheese, shredded
  • Grated Parmesan and mozzarella, for topping

    Directions

    1. Cook the lasagna noodles in plenty of boiling salted water until pliable and barely tender, about 10 minutes. Stir with a wooden spoon to prevent sticking. Drain the noodles thoroughly, coat with olive oil keep them moist and easy to work with.
    2. Coat a large skillet with olive oil. Saute over medium heat, onion,garlic and herbs. Cook 5 minutes. Remove from the pan.  Brown sausage until no longer pink, about 15 minutes. Drain fat into a small container and discard. Stir in the tomato paste completely. Set aside to cool.
    3. In a mixing bowl, combine ricotta, parsley and oregano. Stir in beaten egg. Add Parmesan, season with salt and pepper.
    4. To assemble the lasagna: Coat the bottom of an 8x8-inch pan with a ladle full of tomato sauce. Arrange 4 noodles lengthwise in a slightly overlapping layer on the sauce (cut off extra length), lining each end with a noodle to form a collar that holds in the corners.  Spread 1/2 of the meat mixture over the pastaDollop 1/2 of the ricotta mixture over the meat, spread to the edges with a spatula. Sprinkle 1/2 of the mozzarella on top of the ricotta. Top with a ladle full of tomato sauce, spread evenly. Repeat with the next layer of noodles, meat, cheeses and sauce. Top last layer with noodles, sauce and shredded mozzarella and Parmesan. Tap the pan to force out air bubbles. Tent foil over the pan (to prevent cheese from burning) and bake in a preheated 400 degree oven for 30 minutes, remove foil and cook for 10 minutes more, and set on broil for the last 5 minutes, watching carefully for the cheese to brown.  Remove from oven. Let lasagna rest for 5 minutes so the noodles will settle and cut easily. Cut into 2-inch squares and serve.
    Dinner was late that night (plan plenty of time for lasagna!), so we shortened the hour that it called for and raised the temperature, after having checked other lasagna recipes.  Like I said, it turned out fine and seems hard to mess up.  The original recipe also didn't call for the foil over the lasagna, but we were scared that the cheese on top would burn, so we tented it and broiled for the last few minutes, which turned out fine (again, David keeping me in check!).  Lastly, it said to let it rest for 30 minutes, but it was fine after 5 minutes of resting.  Ours didn't spill over, but we put foil underneath the pan while it baked in the oven just in case.


    Browning the sausage and adding the onion mixture back in

    The ricotta mixture

    Ready for the oven! 

    Served with Texas Toast (no time to make homemade garlic bread!) but still delicious!

    We had leftovers for lunch the next day, and it was still delicious!

    Changes for next time:
    1. Distribute the ricotta and tomato sauce mixture more evenly since it calls for half on the first layer, but there are two more layers after that (though, it all mixes together in the end and still tastes fantastic!).


    Monday, March 28, 2011

    FISH AND CHIPS!

    Would I make it again?  DEFINITELY.  Serve with an ice cold beer.

    Before making fish and chips for David's parents (they're from England, I'm sure they're connoisseurs!), I decided that we better give it a try for ourselves first!  Thanks to David, Maritel, DJ, and Aileen for going on this impromptu adventure with me!

    Here's the original recipe that I used, but just for the fish (you'll soon find out that FoodNetwork.com is my go-to for recipes):
    http://www.foodnetwork.com/recipes/emeril-lagasse/fish-and-chips-recipe2/index.html
    My modifications (for whatever reason - didn't have something on hand, wanted something simpler, etc.) are in red -

    The fish:
    • 6 to 8 cups vegetable oil, for frying
    • 1 1/2 cups all-purpose flour (for the batter)
    • 1 teaspoon baking powder
    • 8 ounces amber beer (Used RedHook MudSlinger) 
    • 2 eggs
    • 2 teaspoons salt
    • 2 teaspoons pepper
    • +/- 2 teaspoons garlic powder and cayenne pepper
    • 1 cup all-purpose flour (for dredging the fish)
    • 2 pounds cod white flesh fish cut into 4-ounce strips 
    • Served with chipotle garlic mayo, garlic mustard mayo, tartar sauce, and malt vinegar (not all mixed together!)
    The fries:
    3 large russet potatoes
    Salt
    1. Peel and cut potatoes - then put them in a bowl covered with ice water and refrigerate for 1/2 an hour to rinse off some of the starchiness.
    2. In a bowl, combine the flour, baking powder, beer, eggs and half of the salt, pepper, and garlic powder and cayenne pepper. Whisk until smooth. Refrigerate for at least 15 minutes and up to 1 hour (had it in the refrigerator for about half an hour)
    3. Heat oil in large pot or in an electric deep-fryer to 275 degrees F.
    4. Cook the fries for 5 minutes just until they're light in color and soft.  Take them out and let them cool.  Meanwhile, heat the oil to 375 degrees F.
    5. Dredge the fish in the all-purpose flour, seasoned with salt, pepper, cayenne, and garlic powder 
    6. Working in small batches, submerge the fish in the batter and carefully place into the hot oil  (as I've learned watching numerous deep fried establishments on Diners, Drive-Ins, and Dives and the like, holding it halfway into the oil first so that it doesn't sink to the bottom and make the batter stick to the basket is key before dropping it in completely!)
    7. Fry the fish until golden brown on the first side, about 2 minutes, then flip and cook until golden on the second side, 1 to 2 minutes longer. Remove the fish from the fryer and transfer to a wire rack positioned over a baking pan so that the fish can drain.  Repeat the process for the remainder of the fish.  
    8. Next, cook the fries at 375 degrees for 5-7 minutes until they look golden brown and crisp.  Salt right after you take them out of the fryer.
    We kept the cooked fish in the oven set at 270 degrees, as we previously heard that it would keep the fish crisp and warm, but alas, it got soggier, so David suggested dropping it back in the oil after the fries right before serving for a minute or so and that worked out perfectly!  (He keeps me in check.)

    Step 1


      The batter before it thickened up in the refrigerator - it should look thicker than this!

      Chipotle Garlic Mayo (LOVE Chipotle Chile Powder) on the left and Dijon Mustard Garlic Mayo on the right
      Possible changes for next time:
      1. Possibly cut the fries more uniformly so they cook to the same crispness - unless you have a crowd who likes the mix!

      Let me know how I did on my first blog!  It feels super long and detailed, but I wanted to make sure to note my modifications.  I'm sure I've forgotten other things too, so feel free to ask questions.  I know I definitely forgot to take more pictures in the process; that'll take some learning.  Thanks for reading if you've gotten this far!